Ready to turn your document into some beautiful braille? Follow the instructions below to get started with the Portabraille Printer!
First, turn the printer on by flipping the power switch.
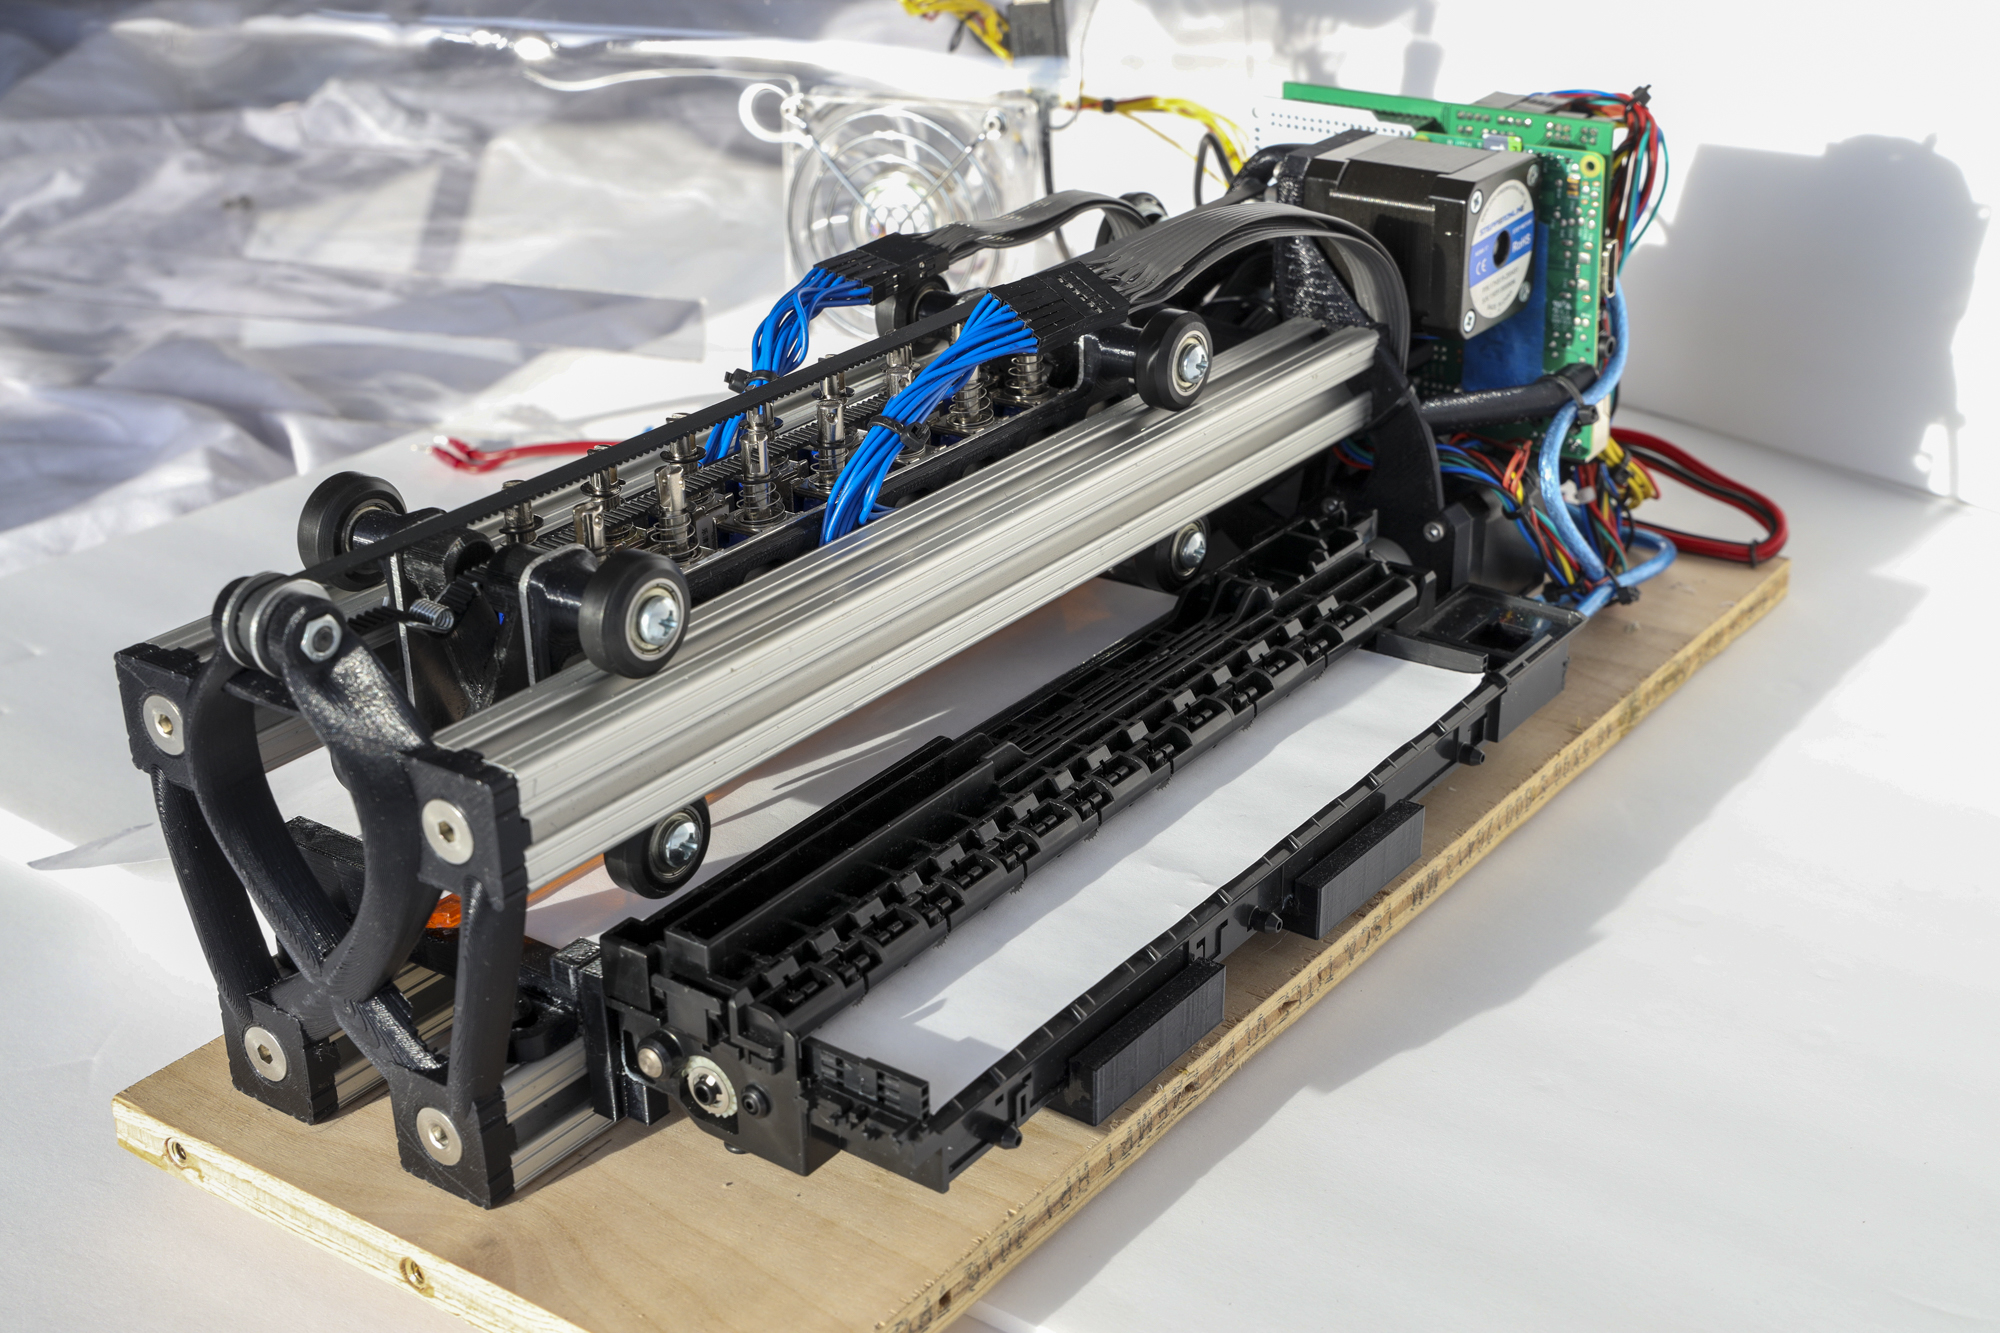
You can find the power switch attached to the 8.5 inch by 4.5 inch by 2 inch metal box which connects to the printer via the two wires which come out of the back (on the same side as the place where paper is inserted).
Next, you’ll need to you’ll need to upload a file to the printer.
Note that you must insert your file as a .txt file. If you are using a word document or something similar, you can choose to save your document as a .txt file using your word processor’s “Save as” menu.
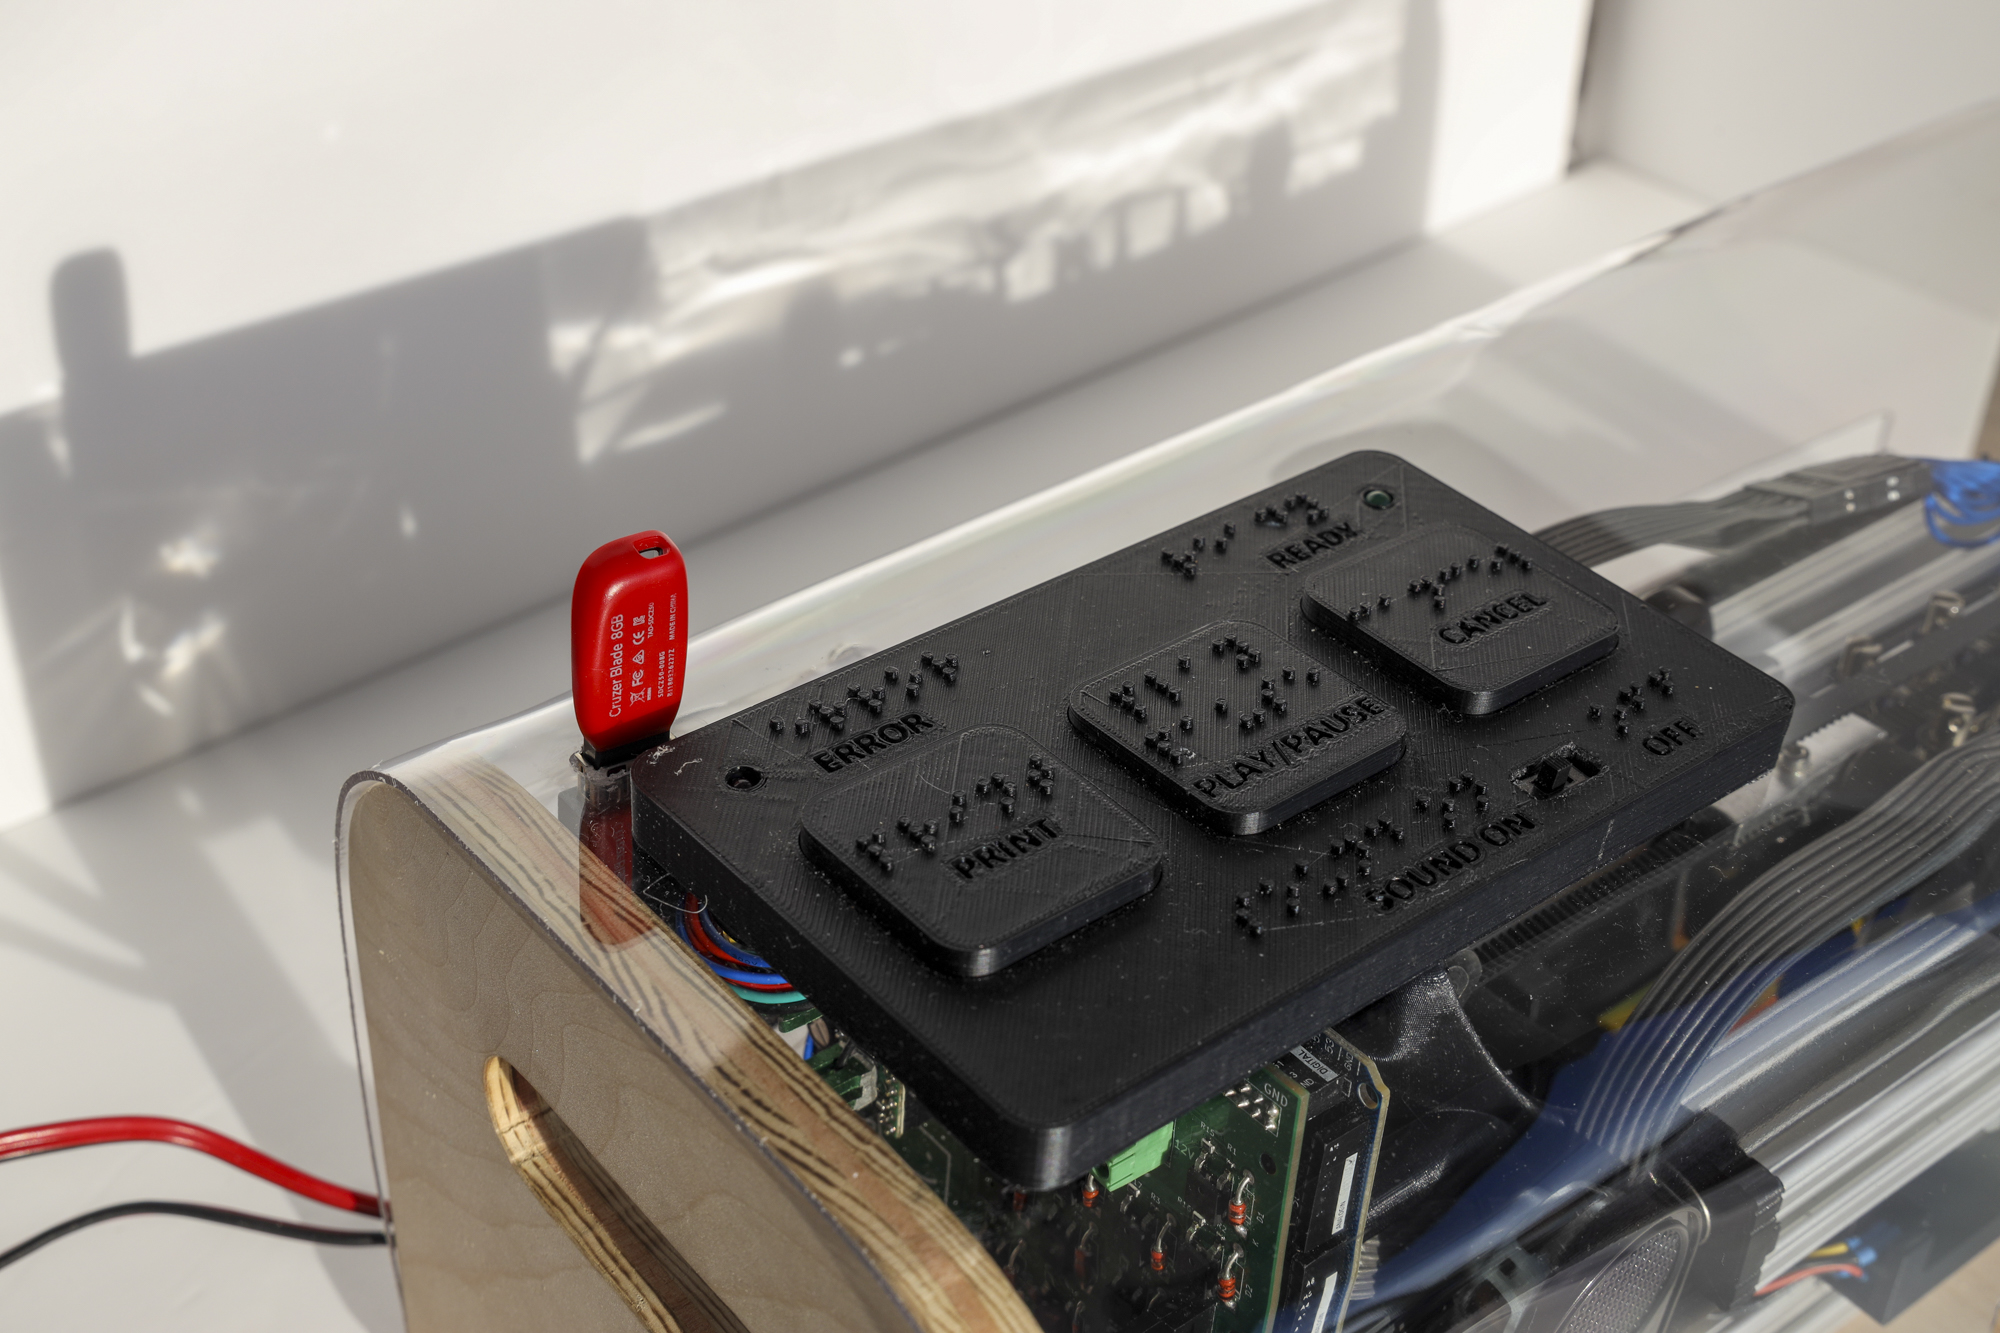
You can do this manually or wirelessly. If you’d like to manually upload your file, insert a flash drive with the file on it into the printer USB port right above the top left of the interface, then use the start print button on the interface to select your file when it has been read. If you don’t select a file, the Portabraille will automatically print the first .txt file listed alphabetically on your USB. If the printer is not reading when you have put your USB in, there is a chance that your flash drive is protected and it is denying the printer permission to access it. Usually, the best way to resolve this quickly is to put the file on a different USB.
You can also wirelessly upload your file. If you’d like to do that, you need to connect your device to the Portabraille Wi-Fi network. The password is TeamDotDotDot! and you can connect to the network like you would any other new Wi-Fi network. Usually, this means going into your Wi-Fi settings and selecting the Portabraille network. Once you are on the network (this process can take up to around 30 seconds), to get to the Portabraille Portal interface, type 10.3.141.1:5000 into your browser search bar. In the portal, you can upload and submit your text file!
Almost ready! Prepare your paper and check the READY TO PRINT indicator.
If it is lit up, that means the printer is ready to print. The printer will also say “The printer is ready to print” out loud when it is ready to print.
The Portabraille Printer takes in one sheet of paper at a time, so you’ll need to manually feed in each sheet by lining it up in the paper tray in the back of the printer. Additionally, before you print, make sure to get visual or aural confirmation from the READY TO PRINT indicator!
Finally, hit the PLAY button to get your print started!
Get ready for some beautiful braille!
However, if there’s a problem with your print, hit the CANCEL button to completely stop it, or the PLAY/PAUSE button to pause and then start the print where you left off.
The Portabraille Printer also has an ERROR indicator LED and a READY TO PRINT indicator LED, located in the top corners of the interface. Anytime you interact with the printer, it plays a noise to confirm your command, but if you’d prefer a more quiet printing experience, change the toggle switch at the bottom of the interface to SOUND OFF instead of SOUND ON.